How to Show Pre Order Status Available in PrestaShop? – User Guide

You want to sell a new product in your store then the most important thing that you want to know about the market demand for those products. For this purpose, you can start a survey, send email to your existing customers or have some other options. All these options are fine but why not go for a more simple solution?

Best Solution to Know the Market Demand

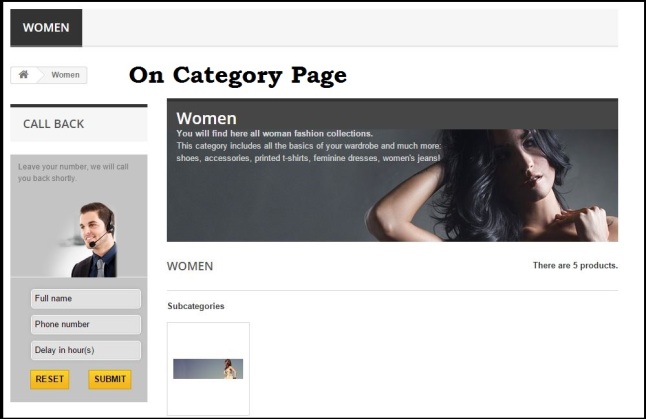
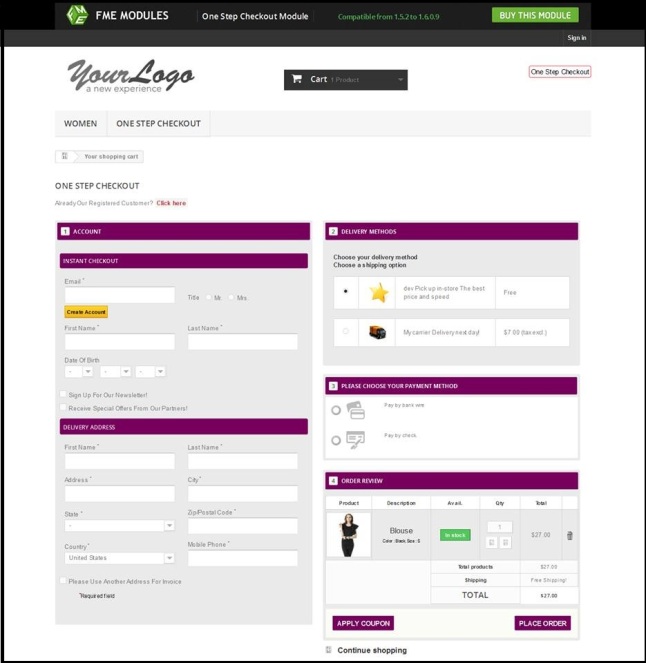
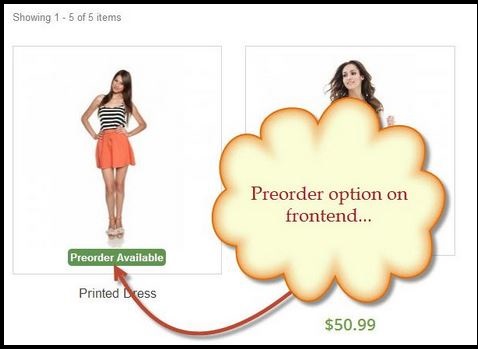
Here we are giving the simplest way to know the demand. The plan is to show a “preorder available for this product” on item’s image at product and category pages. Further, give some options to the interested visitors such that they can subscribe/preorder the purchasing product and you can judge the expected demand through the no. of preorders.

Allow the customers to preorder according to different product attributes will further tell you that in which color or size, a particular product is needed.

The advantage of the preorder feature is not limited to it. Since you can also show preorder status for out of stock products by which you can get manufacturing cost of products from customers.

How to Create Preorder and Waiting List Button in PrestaShop?

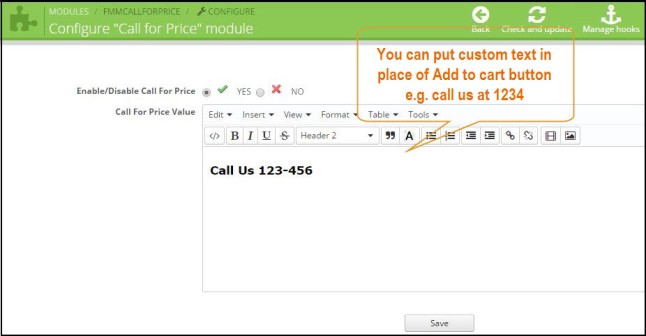
If you’re a developer, then go ahead with the tip and create a preorder and waitlist button on product pages and show them on images. But if you’re not technical or want to do it simply, you can use preorder module that gives exactly the same functionality as given in the last paragraph.

How to Use Preorder Module by FMEModules?

Given below a user guide to use this preorder module on your store;

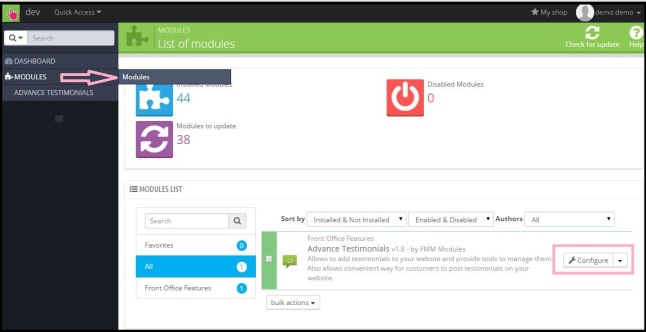
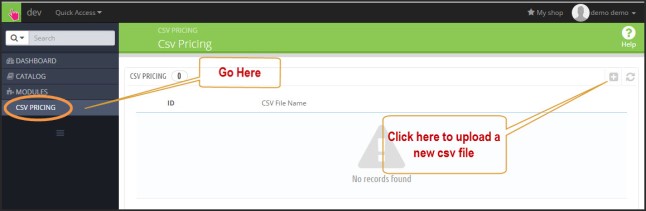
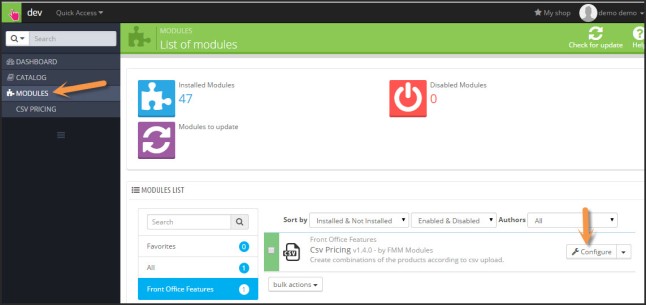
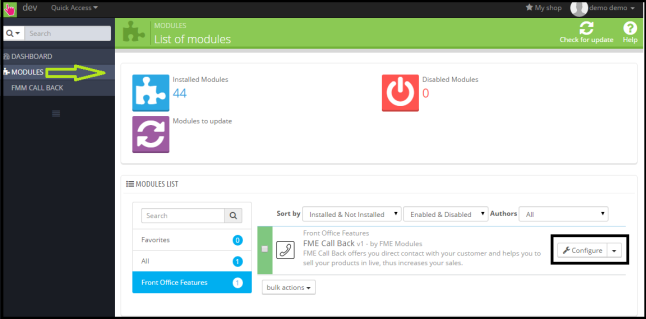
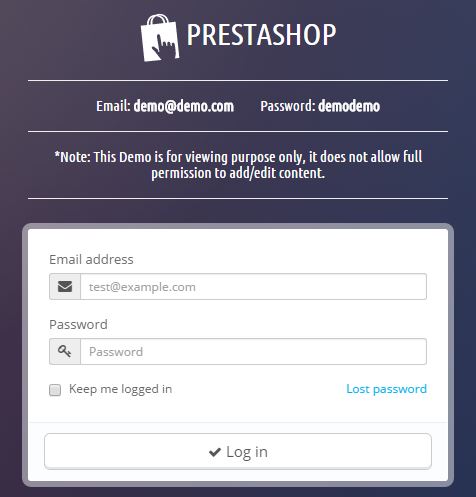
Step 1: Go to your PrestaShop Backend, upload and install the zip file of this preorder and waiting list module.

account login

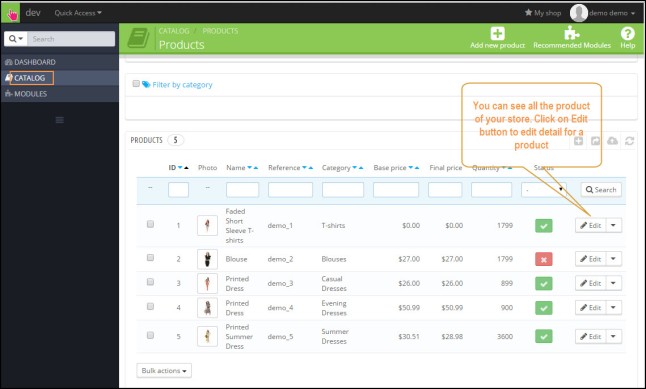
Step 2: From the backend, go to CATALOG>PRODUCTS and click on any product for which you want to allow pre-order.

7-9-2015 4-30-22 PM

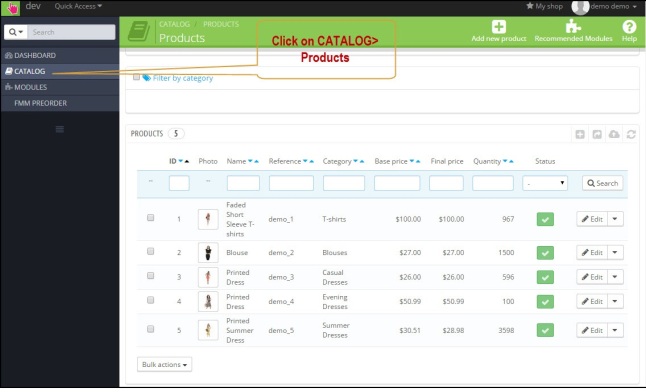
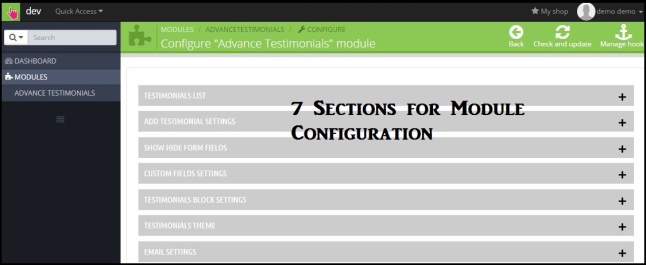
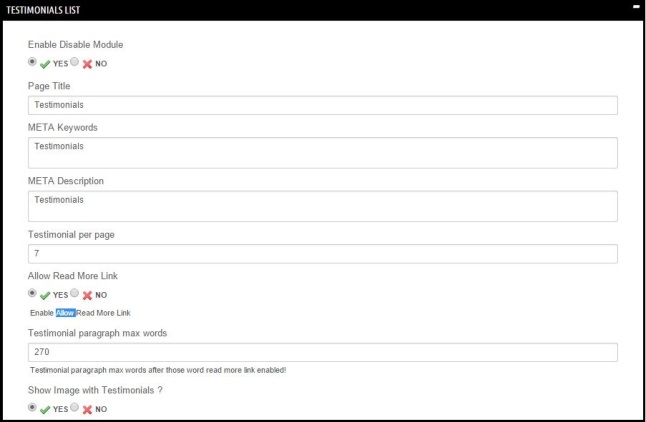
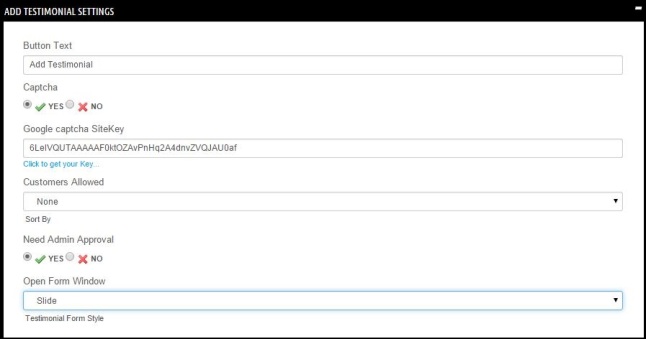
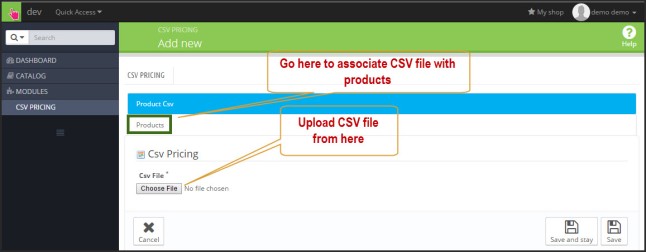
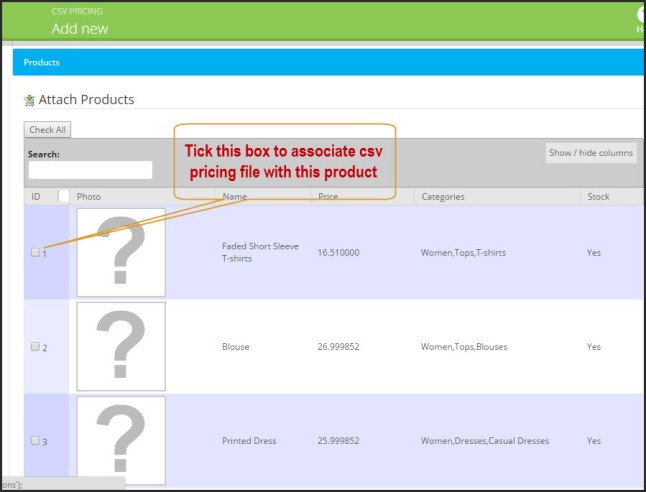
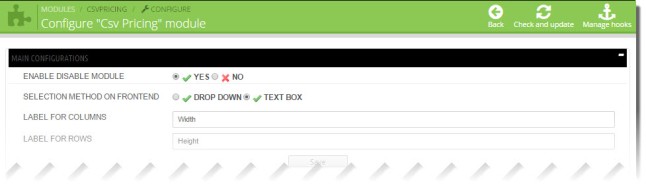
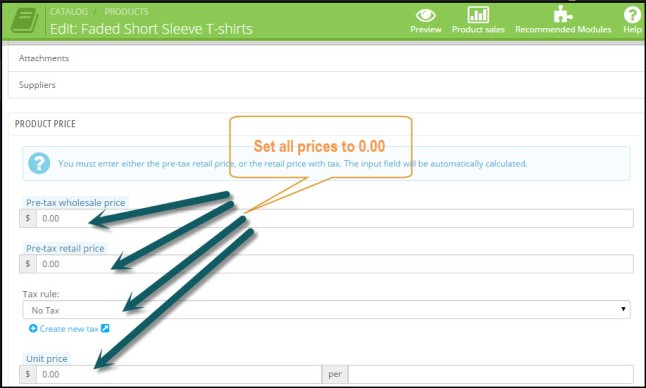
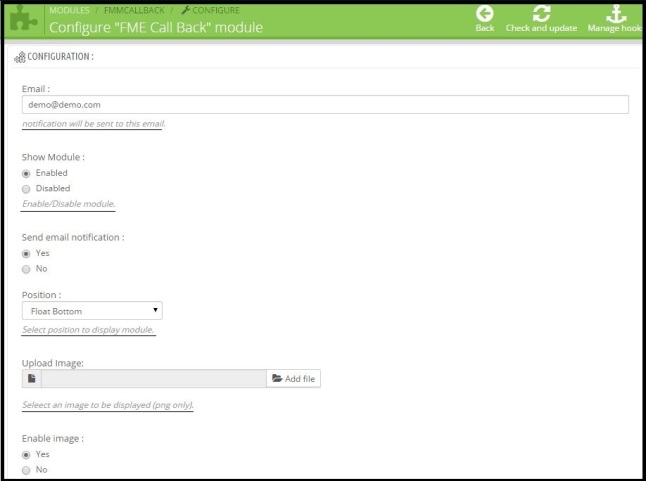
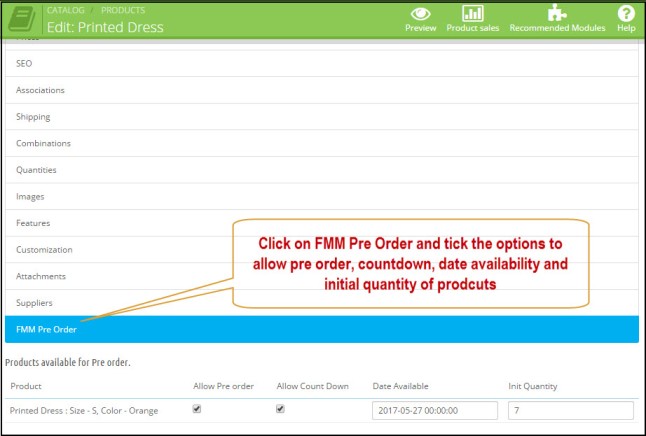
Step 3: In product detail page, go to FMM Preorder Section and set allow preorder, date availability and other options and click on save.

7-9-2015 4-34-58 PM

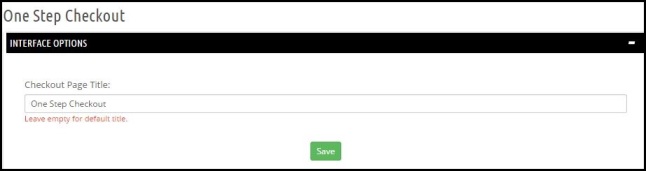
Admin Settings from Backend

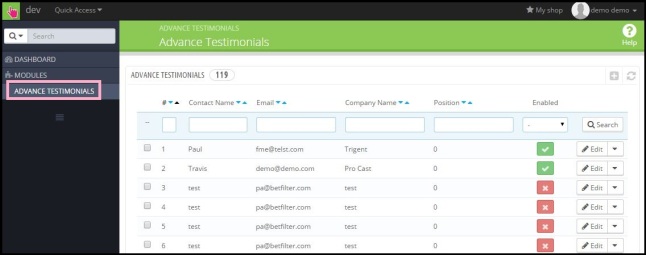
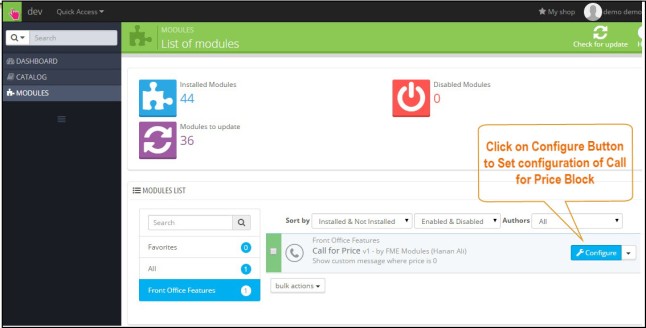
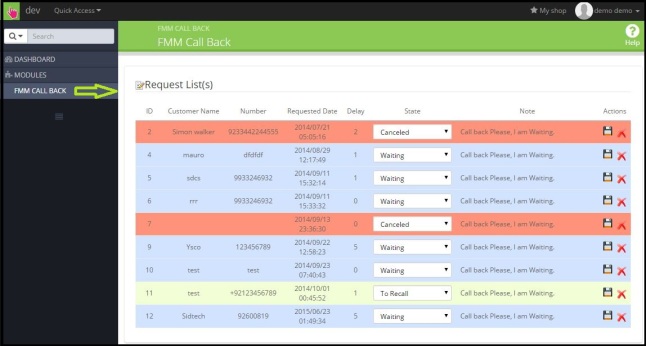
From backend, go to FMM PREORDER waiting list where you can see all the order received from the customers.

7-9-2015 4-43-20 PM

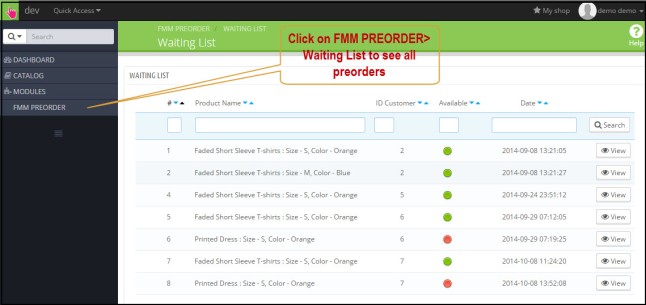
Click on any preorder to see more details which include product name, customer id, customer first name, 2nd name, email, and if notification email is sent or not(represented by red, green light).

7-9-2015 4-45-38 PM

How to Test this PrestaShop Waiting List Module?

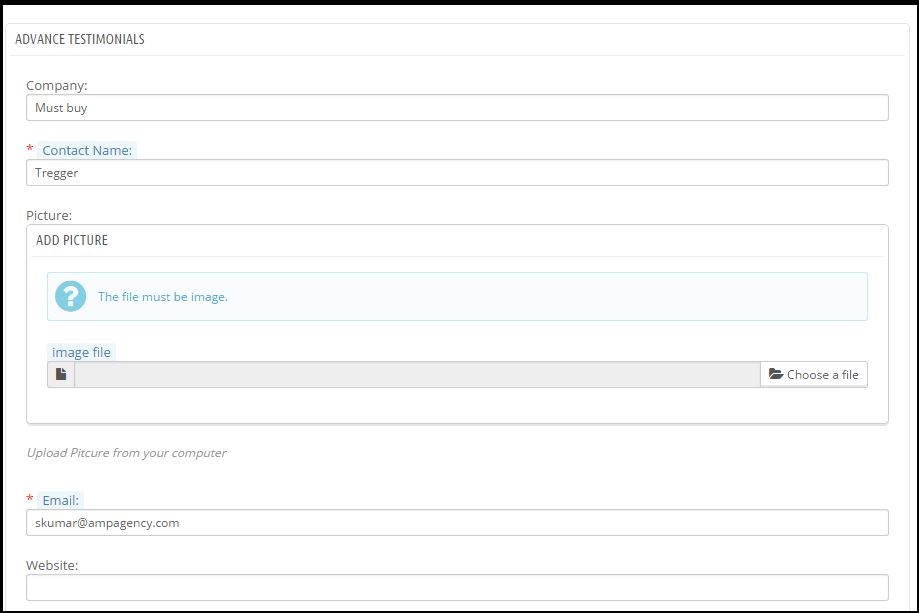
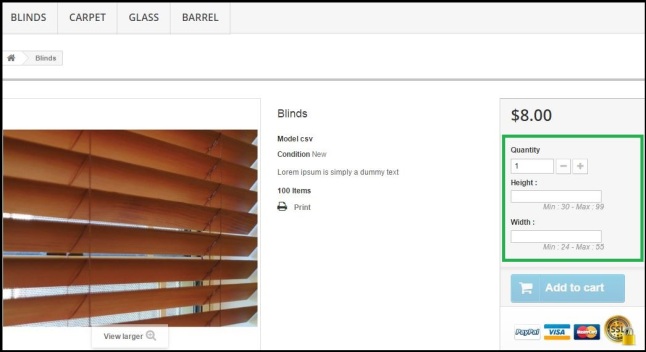
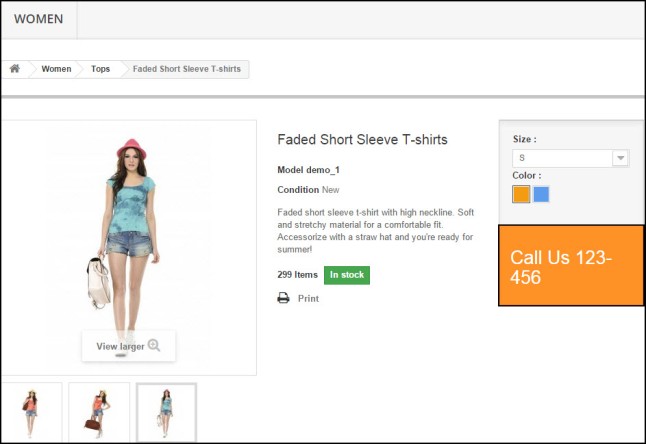
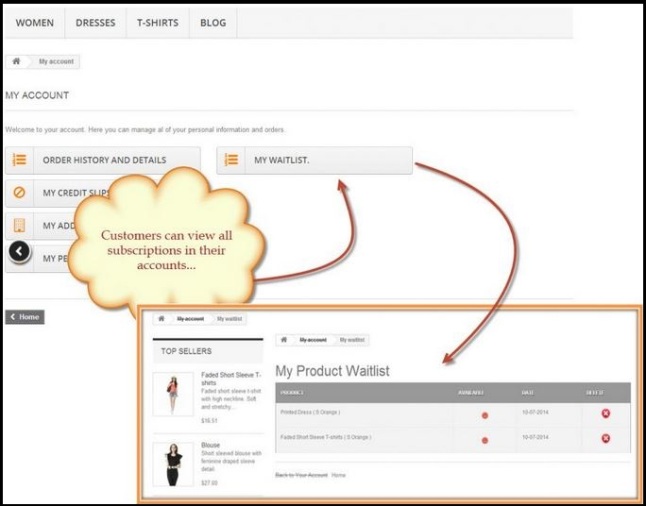
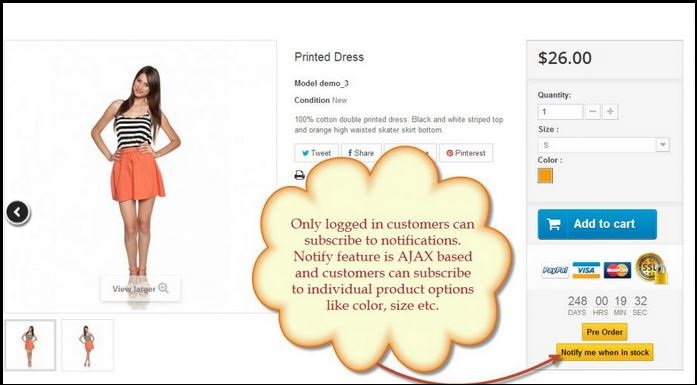
Go to the backend, and enable preorders for some of your products, now go to frontend and see that if the preorder button and waiting list button are available on the product page. Register on the demo site as a customer and click on preorder and waitlist button on the product page. Go to your customer account and see where you can see the preorder details (as the customer).

preorder buttons preorder pre

This Module will be a useful addition to your PrestaShop Store.

Prestashop pre order module is also available on Prestashop Addons.

testimonials

How to Show Home Page Testimonials in PrestaShop? – User Guide

You have probably seen lot of PrestaShop ecommerce store that shows their customer testimonials at home page footer. These reviews are quite helpful to convince the new customers’ right at the first page. The problem that we are addressing today is that you can’t show lot of testimonials there because it will slow down the speed of your whole site.

Then what to do?

Only show 2, 3 reviews. No way!

Because greater the number the testimonials greater the chances of sales. We are not saying that add infinite reviews. You just need to show appropriate number of feedback e.g. maximum 10 to 15.

testimonies2

Solution

In this case, you can make a separate page (shown in main menu) on your home page that will directs to separate landing page of reviews where new customers can see the reviews topic wise e.g. reviews for whole site, reviews for custom support and services, reviews for products etc.

Adding a new cms page in PrestaShop is just easy from the store backend but here the aim is to show testimonials in most presentable way. For this purpose plug-in like Advance testimonials is quite helpful to manage and show customer testimonials in an effective way.

Some Must Have features for Testimonials Page

The testimonial should have following features;

  1. Read more button in case of lengthy testimonial
  2. Limit the no. of testimonials on single page
  3. Allow to submit new testimonials
  4. Testimonials slider block
  5. Testimonials rate and reviews feature
  6. Testimonial reply or comment
  7. Image of customer with testimonial
  8. Admin defined user groups who can post testimonials
  9. Email settings for testimonial moderation
  10. Smooth layout of testimonial page

Given below a user guide for this PrestaShop advance testimonials module

User Guide

At the backend, there are two types of settings involved;

  • Module Configuration Settings
  • Manage Testimonial settings

We will go through here from both setting.

Module Configuration Settings

Step 1: Go to backend of the demo and fill in the credentials seen at the demo page.

account login

Step 2: Go to MODULES>modules and search for Product Testimonials by FMM Modules. Click on module configuration.

advance testimonials

Step 3: On the configuration page, you will see 8 different sections. Go to each section one by one.

advance Testimonials

Testimonial List

From here you can enable/disable module, sort reviews, set title, meta and enable/disable read more link. These are general settings.

customer feedback

Add Testimonials Settings

From here you can set the Add testimonials button label, enable/disable Captcha, allow/disallow user groups for posting reviews, enable/disable admin approval for new testimonials.

add testimonial button

Show Hide Form Fields

From here, admin can allow to show/hide fields for add testimonial form.

customer testimonials

Custom fields

From here, admin can add/edit extra fields on add testimonial form.

custom fields

Testimonials Block Settings

From here, admin can do testimonials block settings like block type, title, number of testimonials, read more link, slider effect, slider timeout etc.

Product Testimonials

Testimonials Theme

You can set different type of themes for testimonials section landing page.

theme

Email Settings

From here, admin can set email notification for new testimonials. Set admin email, email sender name, and subject.

email settings

Manage Testimonial settings

At PrestaShop dashboard, go to ADVANCE TESTIMONIALS>manage testimonial where you can see and manage all testimonials. You can also create new testimonial by your own in case, customers have given reviews through some other platform and you want to show them here on product page.

MANAGE TESTIMONIALS

New Testimonial Page Settings

You can edit following settings for testimonials as given in the images here.

advance testimnials

2

Fronted Display

Go to frontend demo where you can see product page testimonials, listing page for testimonials and add a testimonial form respectively.

PrestaShop testimonials

Users can add new testimonials by clicking Add Testimonials Button

add testimonial

Summary

If you’re a business starter and want to stabilize the business, get positive reviews from your current customers and became a successful seller.

How to Calculate Prices of Variable Sized Products in PrestaShop? – User Guide

One of our client David Milosz who sells liquids, canvas, banners, fabric, blinds, barrels etc on his PrestaShop store came to us with the problem that his clients call him to know the prices of products. It was quite a big headache for him to deal with them all.

This was a real problem since there is no direct way to show prices of variable sized products as they vary with changing dimensions heights, length, width etc. He was hiding the price of product and adds to cart button using call for price plugin and in place he was displaying a custom text “Call for Price at 1234”. Whenever users want to buy anything, they call to him to know the prices for different sizes of the products.

call for price

Solution to Calculate Prices of Variable Sized Products

We decided to address this problem and developed a CSV pricing extension for him which has made the pricing calculation really simple. All he needs to make a csv file comprising of different sized combinations. He then uploaded the file with his products and now when a customer enters a length and width, system scans the csv file combination and displays it on front page within seconds.

Given below a quick user guide to know that how this canvas pricing PrestaShop works;

User Guide

Step 1: Create a new csv file contains different combination of length and widths according to your need.

PrestaShop csv pricing

Step 2: After installation of this module, go to dashboard and then Go to CSV Pricing Menu in left column.

PrestaShop csv pricing

Step 3: Click on + button to upload csv file which will open a window to upload csv file.

PrestaShop csv pricing

Step 4: From the same window, go to Product from where you can associate csv file with products.

PrestaShop csv pricing

General Settings

At the store backend, go to MODULES>Modules and search for CSV Pricing by FMEModules. Click on configure button.

PrestaShop csv pricing

From the configuration window you can enable/disable module, select method of drop down/text box. Set the labels for column and rows at front end.

PrestaShop csv pricing

How to Test the blind pricing PrestaShop Module?

Make a new csv file, upload it from the store backend, associate the file with products and then look at the front end of those products where you can see the pricing calculation using CSV file.

csv pricing

Advantage

PrestaShop barrel pricing module provides you a way to save a lot of your time and energy for dealing the customers. Customers will also fell satisfaction by using this great feature.

PrestaShop Call for Price PrestaShop Module – User Guide

It is an advance business strategy to hide the prices of products from your competitors. In this way, it is possible to offer products at lesser prices as compared to market and get more sales. This is Ok upto the concept of this strategy but when we start implementation on PrestaShop store, it becomes pretty confusing. The reason is that if the prices are not visible at product page then customers may feel confusion that what is the price and what is the further procedure to purchase this product.

Solution

Feeling the problem of PrestaShop merchants, “FMEModules” has developed Call for Price module which enables the customers to hide the price and add to cart button from the product page and instead show a custom text like Call us at 1728-901 for purchasing the product. In this way, interested customer will call the retailer and get the product according to the procedure specified.

call for price button

How Call for Price is Useful?

Call for price feature is quite useful for ecommerce in the following way;

  • Hide the price of product from competitors
  • Hide price for free products
  • Hide price for out of stock products
  • Hide price for those product for which you want to bargain with the customers
  • Hide price when buying procedure is different from normal procedure

Given below a user guide for this hide prices PrestaShop module that will help you understand the working procedure of this plug-in;

User Guide

There are two settings for this PrestaShop hide prices module;

  • Module Configuration
  • Product Association with Hide Price

Module Configuration: After installation of this module from backend, go to MODULES>modules and search for Call for Price by FMEModules. Click on configuration button from where you can set formatting of call for Price block as shown in figure;

call for price button

call for price

Product Association with Hide Price:

Step 1: Go to CATALOG>products and where you can see the entire products available in your store. Click on Edit button for which you want to show call for price button.

call for price

Step 2: From product detail page, go to Prices and set all the prices to 0.00 including taxes.

call for price button

Go to frontend, where you can see a call for price button on product page for which you have set prices to zero in step 2.

call for price button

Forethought

Hiding price is of course a great feature of ecommerce. Hopefully, you can get an edge over your competitors by using this feature. It can bring double benefit for you, i.e. more sales and good relation with the customers.

PrestaShop Clean URL

How to Clean PrestaShop URLs using Pretty URLs Module? – User Guide

It is quite clear fact that Google likes those websites and activities that are liked by the internet searchers and vice versa. It means that Google ranks those sites better that are more user friendly including their urls and content and overall browsing experience.

PrestaShop Clean URL

In today’s post, we will explain that which url structure is good for PrestaShop stores. By default, PrestaShop urls contains Ids, numbers and tags that are considered ugly by Google as they are not according to Google guidelines. This reason is just as explained in the first paragraph i.e. these urls are not most relevant to customers query. On the other side, clean urls exhibits category, sub category and products in an organized way without ids, so Google likely to rank them better in SERPs.

Ugly URL: http://www.myprestashop.com/product.php?id_product=27

Pretty URL: http://www.myprestashop.com/music-players/ipod-nano-green

How to Clean PrestaShop URLs from useless information?

By default PrestaShop has option to clean urls at store backend i.e. Preferences -> SEO and URLs. Turing it on makes the urls clean but it still contains ids that must be removed so that urls become completely pretty. For this purpose, FMEModules has developed Pretty Urls Plugin that has ability to remove the ids automatically and redirect the urls permanently to new clean address.

How to Clean Urls using Pretty URLs Module?

Given here a user guide to use this Pretty URLs Module on your PrestaShop store;

This seo url PrestaShop module automatically removes the ids, number and tags from the ursl once installed on a PrestaShop store. But keep in mind that this plugin cleans only product urls, for cleaning CMS page urls of your store, you can do it manually through backend following the given steps;

Page by Page URLs Settings                                 

Go to backend of your Store and PREFERENCES>SEO and URLs where you will find different pages of your store. You can edit/rewrite their urls as shown in figure.

PrestaShop Clean URL

PrestaShop Clean URL

General Settings

Turn on friendly urls and turn off accented urls. Here accented urls means that either special characters are allowed to appear here or not.

PrestaShop Clean URL

Set Shop URL

You can set shop domain, ssl domain and base url here.

PrestaShop Clean URL

Schema of urls

You can set the scheme of urls here as shown.

PrestaShop Clean URL

Robots file generation

You can generate robot.txt file from here.

PrestaShop Clean URL

Forethought

PrestaShop url id remover is quite an amazing plugin that automatically turns the urls to pretty free form ids.

call back

How to Show Call Back Form in PrestaShop? – User Guide

When a customer visits your store and wants to buy some products from, it is natural that they have some queries about the products. Customer can only take the decision of buying when all the queries and confusions are well addressed by the merchant.

call back

Now the question arises that how customer can get answer of his queries. There are certains ways of doing that for a PrestaShop store like

  • Read the product faq
  • Submit the query by mail
  • Live chat

All the methods are fine upto their functionality but why not go for an advanced technique. Go for such system on your store that enables the customers to chat with you through phone.

What are limitations for contact through Phone?

Time synchronization is biggest problem when admin or customers call each other for getting information. May be when the admin call, the customers may be buys in some other activates like lunch, meeting, journey etc. If this thing is addressed, contact through phone will be most effective way of communication.

“FMEModules” has developed a PrestaShop Call Back Plugin which addressed this issue very well. This plugin provides a call back form on front end of PrestaShop store that have necessary fields of Name, phone number and time of availability for call. The 3rd field is most necessary field because it has removed the time synchronization issue between customer and merchant.

Given below a quick user guide to use this module on your store;

User Guide

Module Configuration

Step 1: Go to backend demo of the module and fill in the credentials.

account login

Step 2: Go to MODULES>modules and search for FME Call Back by FMEModules and click on configure.

PrestaShop Call Back

Step 3: On the module configuration page, fill the necessary fields like email of admin, enable/disable module, and send email notification enable/disable, position of call back form, upload image for agent who call the customer, enable/disable image and text to display at frontend.

PrestaShop Call Back

Finally click on save button.

You can see all the call requests in dashboard under FMM CALL BACK in the main menu. For each call request admin can see ID, customer name, number, Requested Date, delay, State, note.

Admin can set the state of each call back request and add a note, clicking on save will save the ticket status and note.

PrestaShop Call Back

Frontend Demo

At the front-end home and category pages, you can see a call back form through which your customer sends call requests to you.

PrestaShop Call Back

PrestaShop Call Back

How to Test Module PrestaShop We Call You Back Module

Go to frontend of the module and submit a call back request through the form provided on home and category page. Fill your name, phone number and delay in hours and submit. Now go to your email where you can see that a call back request is received (admin email for notification can be configured from backend). Also at the backend you can see the submitted call back request under the FMM CALL BACK section. You can further set the status of call back request and internal note.

Summary

If customer’s queries are addressed in an effective way then getting more sales in possible is just simple. So use this PrestaShop request callback module and remove the communication gap between you and your customers.

customer reivews

How to Show Product Testimonials in PrestaShop? – User Guide

Testimonials play an important role for making a business stable such that it can stand alone on its feet even in the low sales period. The reasons behind is that incoming customers of your store always like to check the product testimonials on product details page. If they find good testimonials, they show zero hesitation while purchasing the product. In the other case, with negative testimonials or no testimonials, customers think that the product has some problem and in the beta mode such that no one reviewed it yet.

customer reivews

Reading reviews about a product is natural mindsets in all continents. Whenever users have to buy a Laptop, iPhone or any other gadget, they always visits reviews engines to check reviews of user about the products. Therefore, you need to have plenty of reviews on your product pages.

How to Show Product Testimonials in PrestaShop?

In PrestaShop there are no direct options to get customers reviews and show them on product pages. You need customization or writing your own module. To simplify the process, “FMEModules” has developed Advance Product Testimonials module for PrestaShop ecommerce store. This plugin allows admin to show testimonials on product page and a separate landing page. New visitors can like, rate or reply a testimonial or they can add their own testimonials by clicking on the add testimonials button on product page. Given here a user guide to show customers testimonials using PrestaShop product reviews extension;

User Guide

At the backend, there are two types of settings involved;

  • Module Configuration Settings
  • Manage Testimonial settings

We will go through here from both setting.

Module Configuration Settings

Step 1: Go to backend of the demo and fill in the credentials seen at the demo page.

account login

Step 2: Go to MODULES>modules and search for Product Testimonials by FMM Modules. Click on module configuration.

advance Testimonails

Step 3: On the configuration page, you will see 8 different sections. Go to each section one by one.

customer feedback

Testimonial List

From here you can enable/disable module, sort reviews, set title, meta and enable/disable read more link. These are general settings.

customer feedback

Add Testimonials Settings

From here you can set the Add testimonials button label, enable/disable Captcha, allow/disallow user groups for posting reviews, enable/disable admin approval for new testimonials.

add testimonial button

Show Hide Form Fields

From here, admin can allow to show/hide fields for add testimonial form.

customer testimonials

Custom fields

From here, admin can add/edit extra fields on add testimonial form.

custom fields

Testimonials Block Settings

From here, admin can do testimonials block settings like block type, title, number of testimonials, read more link, slider effect, slider timeout etc.

Product Testimonials

Product Testimonials

From here, admin can enable/disable product testimonials, set title of testimonial section, set style, slider width etc.

Product Testimonials

Testimonials Theme

You can set different type of themes for testimonials section landing page.

theme

Email Settings

From here, admin can set email notification for new testimonials. Set admin email, email sender name, and subject.

email settings

Manage Testimonial settings

At PrestaShop dashboard, go to MANAGE TESTIMONIALS>manage testimonial where you can see and manage all testimonials. You can also create new testimonial by your own in case, customers have given reviews through some other platform and you want to show them here on product page.

active testimonials

New Testimonial Page Settings

You can edit following settings for testimonials as given in the images here.

advance testimnials

2

attach products

Fronted Display

Go to frontend demo where you can see product page testimonials, listing page for testimonials and add a testimonial form respectively.

testimonail

front page

add testimonial

Summary

If you’re a business starter and want to stabilize the business, get positive reviews from your current customers and became a successful seller.

help desk

How to Use Help Desk Eticket Module by FME – User Guide

Today we are discussing the most wanted module of PrestaShop e.g. Help Desk Eticket Module which is capable to enable an e-ticketing system on your PrestaShop store. This module provides comprehensive set of features that makes easy ticket management for the merchants and also customers can communicate with the merchants in a systematic way.

help desk

Why Eticket System is needed in PrestaShop?

Customers complaint management is a difficult task if you’re using traditional system of fixing support related issue. Such traditional systems are just like;

  • Through call on Phone or skype
  • Through Email
  • Through Social Profiles

These all are manual ways for giving support takes a lot of time and more chances of confusions between customers and merchants resulting in loss of customers. Therefore why not use a ticket management system for this purpose, which can make the whole process really simple.

How to Use Help Desk Eticket Module by FME?

We suppose here that you have installed this PrestaShop support module. Now you should have to follow the given below steps;

Step 1: Go to backend demo of this module and fill in the credentials.

account login

Step 2: From dashboard of your store go to HELPDESK from left menu where you will see 6 separate sections.

help desk

Step 3: Go to HELPDESK>manage tickets section, where you can see all tickets. Clicking on any ticket, ticket detail page will open up. From ticket detail page you can reply ticket, change ticket status, change ticket department, change ticket priority, add signature or select close ticket on reply.

manage tickets

ticket detail 1

ticket detail 2

You can also define internal notes for departments here.

internal notes

Step 4: Go to HELPDESK>manage ticket status from where you can do settings for active/closed status of tickets.

manage status

manage status 1

Step 5: Go to HELPDESK>manage ticket priorities from where you can edit priorities title, color and enable/disable.

ticket priority

Step 6: Go to HELPDESK>manage departments from where you can make and manage new departments. (Click on + sign to create new department).

manage depatments

Step 7: Go to HELPDESK>manage email templates from where you can edit emails templates. You can set here two type of templates user to admin and admin to user. These templates will be sent to user and admin when a new ticket is created or replied.

manage email tempalte

Step 8: Go to HELPDESK>manage premade replies from where you can define and manage pre-made replies for the tickets. (Click on + sign to create new pre-made reply).

pre-made replies

Module Testing

Go to frontend demo of the store and from the opened page create new tickets using your email address. When you create reply, an email notification will be sent to you in your email about your ticket information. This notification email will also be sent to admin (email templates are defined in Step 7). After the ticket creation, admin can go to backend, see all tickets and reply from there. You can use pre-made replies as you have learnt to create in step 8.

Summary

This module is loaded with extra functionalities Pre-made replies, internal notes, custom ticket status, and custom ticket priorities, create signatures for departments. Also ticket creator can reply the ticket directly from their email.

How to Use PrestaShop One Step Checkout FME’s Module? – User Guide

When we look different reasons of abandoned carts in ecommerce, multi-step checkout is among one of the main reason. Coming to the next step that why multi-step is problem, some reasons are totally oblivious that are;

  • Customers want to consume less time for shopping.
  • Customers may lose internet connection/power outage during lengthy checkout.
  • Customers may have to perform some other activity and after that they forget to come back to checkout of your web-store.
  • Customers may feel annoyance for clicking next button to go to next step.

Therefore, to reduce abandoned carts merchants should prefer one step checkout.

How to Enable One Step Checkout in PrestaShop?

PrestaShop and Magento by default have 5 step checkout processes. If you have decided to go for one step checkout, you need to customize the checkout. One Step Checkout module is a readymade solution to enable this feature in PrestaShop.

Some must have Features for Your One Step Checkout Page

  1. If customers are already registered, one step checkout will automatically pick the user date during one step checkout.
  2. It should support guest checkout.
  3. Check out page should be simple with clear background.
  4. Checkout page should have only most necessary fields.
  5. It should support different information block like Account, delivery method, Delivery Address, payment methods, order preview(facility to delete products from checkout) i.e. all the 5 page steps will be shown in block in one page.

How to Use One Step Checkout FME’s Module?

We will give you here the overview of backend and front-end demo of this PrestaShop One Page Checkout plugin.

One Step Checkout For PrestaShop

Backend Settings

Step 1: After purchasing this module, login to the backend of your store, then go to MODULES>modules, import the zip file and install.

account login

Step 2: Go to MODULES>modules and access PrestaShop quick checkout module, click on configure button.

one step backend

Step 3: On configuration page, you will see three sections.

three sections

Step 4: Go to Interface Section and give title for One step Checkout page.

Title of one step chekcout

Step 5: Go to visual option and change the color of the one step checkout.

visual options

Step 6: Go to Order Configuration page and do the settings for orders.

order confirmation

Frontend Demo

Go to frontend demo of your store and where you can see the changes that you have done from the backend. Obviously this will be a fast one step checkout.

One Step frontend

Summary

One Step checkout is a good solution to reduce abandoned cart rate of PrestaShop Store. Get this module today and go for healthy sales.

How to Show Popup on different Pages of PrestaShop Store? – User Guide

Most of the people think that notification popup appearing on an online store annoys the customer and they may leave the store just after opening it. This is not true if popup are used in a right way. For example, when a customer lands on an online store and a popup appears there to tell him that

  • A discount of 10% is available on this store
  • Subscribe to newsletter and get a free product
  • Like the Facebook Page and get 20% discount
  • Subscribe for newsletter and get a gift hamper

Customers like such notifications that are giving them a benefit in free. In return, merchants will be able to collect information of related customers that obviously will help them to make strong customer base. The discussion shows that popup are equally beneficial for store owners and merchants.

PrestaShop Popup

Notification popup are a good source of traffic because they catch the customers’ attention at the right time. Here we will discuss that how fancy box popups can be created in PrestaShop store.

How to Show Popup on different page of PrestaShop Store?

This function is not available by default in PrestaShop. However popup can be created be popup creator modules. Such module has extended features of popup customization and enabling/disabling them for different page like home page, category and product pages.

Given below the guide to use PrestaShop Fancy Popup Box module by FMEModules;

User Guide

After installation of this PrestaShop notification bar plugin, you have to pass through following steps.

Backend

Step 1: Go to backend of your store and fill in the credentials.

account login

Step 2:  Go to MODULES>modules and access Notification Box by FMEModules. Click on configure.

popups

Step 3: From configuration page, click on + button to create a new popup.

create popup prestashop

Step 4: On the new popup creation page, fill the necessary fields as shown in figure.

Popup create 1

popup create 2

popup create 3

Step 5: Click on save button.

Front End

Go to frontend of your store, where you will see that a popups suddenly opens up when a new visitors comes there as per the settings of the backend.

Popup home page

Summary

Popups good or bad depends on their use. If used efficiently they can bring more sales and traffic however a bad way of displaying popup will really cause loses for you.